|
ULTIMATE ELECTRONICS TOOLS AND COMPONENTS GUIDE
This guide has been carefully curated to present high-quality tools and components, as available on the market today, at the best price possible.
Our
selection is based on our own experience with most of these
products, and also on a bias towards professional-grade tools
that you can keep using for many years, as you grow from beginner
to expert. |
|
|
TOOLS |
|
|
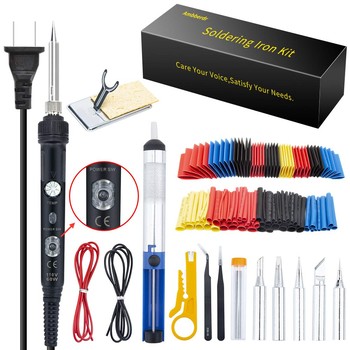
Adjustable Soldering iron (Low-cost kit) The soldering iron should be adjustable so that you may lower the temperature when soldering sensitive parts, while still being able to output 60 Watts of heat or more for tasks which require more heat. Having a power switch is preferable too, and for less than $15 you can get a decent iron with both features and some extra goodies. |
|
|
Adjustable Soldering iron (Portable kit) This model provides digital temperature controls and readout, allowing you to precisely adjust the temperature according to the task at hand, and is especially helpful to minimize the risk of damaging heat-sensitive parts. You can get a cheaper model however it doesn't have a sleep function, which is rather nice to have. |
|
|
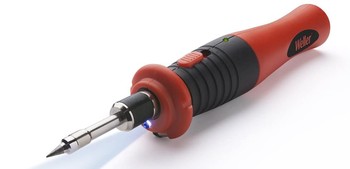
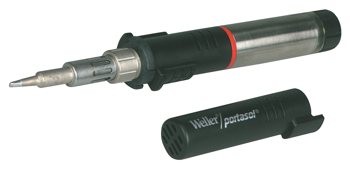
Cordless
Soldering Irons Typically used outdoors where no power source is available, they come in two varieties: |
|
|
|
|
|
|
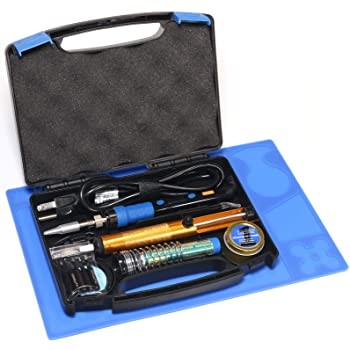
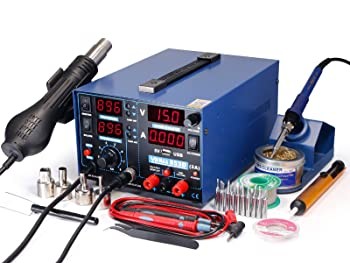
Multipurpose Soldering Station - Full Kit This kit includes a lot of tools typically used for soldering both through-holes and surface-mounted parts. This station also contains an adjustable power supply and a voltmeter. Using such a station instead of separate tools for each purpose saves a lot of desk space and outlets. |
|
|
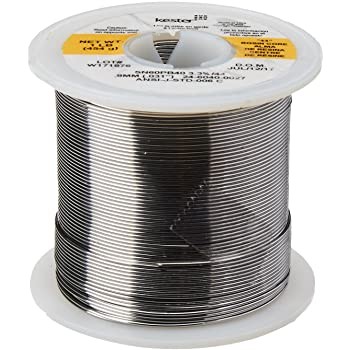
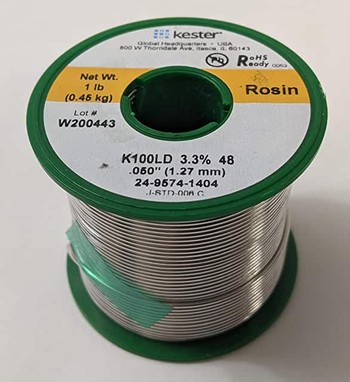
Typically mixed in a tin/lead ratio of 60/40 or 63/37, with a hollow core containing rosin flux. The tin/lead ratio doesn�t make a noticeable difference, but the quality and proportion of rosin flux does, so we recommend buying a well known brand. A 1lbs spool will last you years so the price difference is negligible over time. Common thickness ranges from 0.5 to 1.0mm, with 0.8mm providing a good balance for most situations. |
|
|
European Union rules dictate that mass-produced electronics must be lead-free. Lead is poisonous when ingested in quantities above trace amounts. However, lead-free solder is more expensive, requires higher temperature and creates unsightly solder joints. Unless you really have to use lead-free solder, you may be better off using tin/lead. To be on the safe side, wash you hands after handling lead and keep your food and children away from your soldering workbench. |
|
|
The primary benefit of adding silver to the mix is the increased strength it provides, especially for stressed parts held solder only, like ports, spliced wires, and moving parts such as switches and potentiometers. |
|
|
Even though it only contains 2% or 3% of silver, it visibly helps improve the appearance of solder joints, and provides additional strength. |
|
|
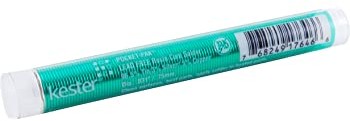
Rosin flux can make almost any soldering task easier, it�s an acidic compound which causes the solder to spread and stick to the metal and helps preventing bridges from forming between tightly spaced pins and pads. The pen allows applying the flux sparingly and lasts for a long time. |
|
|
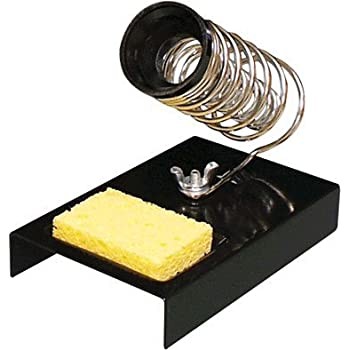
Wet Sponge (with iron holder) Used to clean the tip of the soldering iron by rubbing and twisting it against the sponge, it traps the old solder, leaving the tip ready for the next soldering joint. While many people use sponges, we recommend using a brass sponge instead, as the sudden drop in temperature from water tends to wear out the soldering iron tip and accelerates oxidation. |
|
|
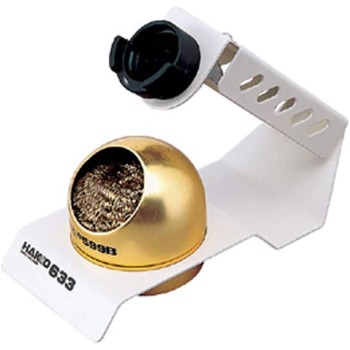
Brass Sponge (with iron holder) We prefer brass sponges as they allow the soldering iron tip to maintain its temperature, and prevent premature wear of the tip. To clean the tip, gently poke the brass wires once or twice and the tip will be ready for the next soldering joint. Our favorite iron holder made by Aven was out of stock as of this writing, the Hakko one depicted on the right is the next best alternative. |
|
|
Iron
Tip Tinner Once in a while it may be necessary to remove oxidation and apply a fresh layer of tin on the tip. Tip tinner is a mixture of ammonia phosphate (a compound which cleans the tip by removing oxidation and baked flux), and pure tin (which melts and forms a new layer on the tip). |
|
|
Mistakes happen, components fail, and the easiest way to remove old/excess solder is to use a vacuum pump. They are especially helpful to remove solder inside of through holes. There are dozens of variations on this tool but they all get the job done equally well, as long as you remember to load the spring before pressing the release button, which is a rather common oversight! |
|
|
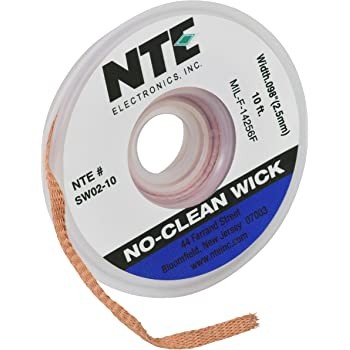
In some situations the vacuum pump isn�t the best tool for the job and braided copper is the best alternative. The copper is coated with rosin and when placed between the solder and the iron, as the solder underneath starts to melt, the solder gets pulled into the braids. |
|
|
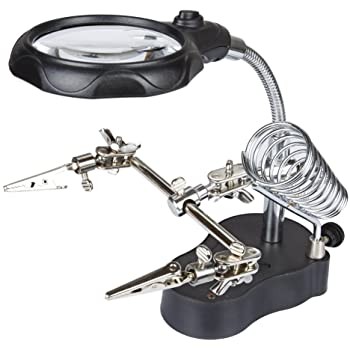
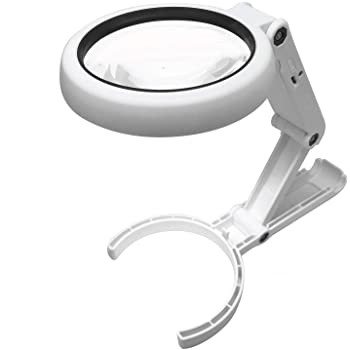
As it takes both hands to hold the solder and soldering iron, most of the time we need helping hands to hold the circuit board and parts. Helping hands come in many shapes and forms. Some have many flexible arms, allowing to keep multiple components in place to solder at once. We use the model pictured on the right as it also provides lighting, bi-focal magnification and is inexpensive. |
|
|
When working with small components it is often necessary to use a magnifying glass and have plenty of light to examine solder joints. Many lens options are available, we recommend a magnification level between 3x and 5x while soldering small parts, and 10x to closely inspect solder joints. This
budget model does both and doubles as a hand-held magnifier. |
|
|
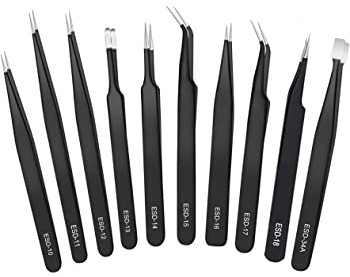
Tweezers are a must. You probably won�t use them daily but you better have a proper set as you will need them eventually. Make sure you get a well crafted set, where the ends meet perfectly, with anti-static coating, such as the set on the right which is the one we use. |
|
|
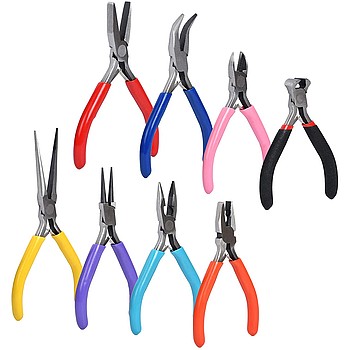
In electronics, pliers are mostly used to cut wires and soldered legs, sometimes they are also needed to bend pins or shape wires and metal plates. It�s good to start with a full set of basic pliers, and later on, replace the ones you use the most with top quality ones. This could apply to any tool, but the quality difference is most appreciable with pliers. |
|
|
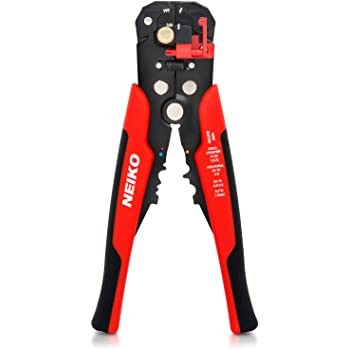
There are many different way and tools to strip the insulation sleeve of wires, we�ve tried all of them, and this tool is our favorite one. It allows you to strip multiple wires of the same gauge at once and ribbon cables up to 10 lanes wide, which saves a lot of time when stripping hundreds of wires. Its sturdy construction makes it a bit too heavy for small hands, in which case this lighter version would be easier to handle. |
|
|
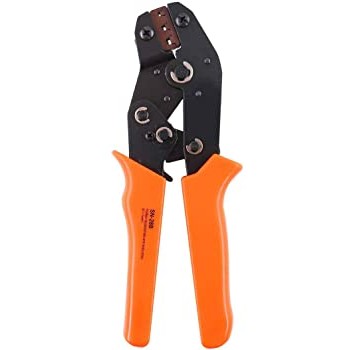
Crimping Kit (DuPont connectors wire crimper) This kit enables you to make custom cables with the optimal length using DuPont connectors, for connecting to standard 2.54mm (0.1�) pin headers which are broadly used on circuit boards and modules. The crimper can also be used with many other other connector types.
|
|
|
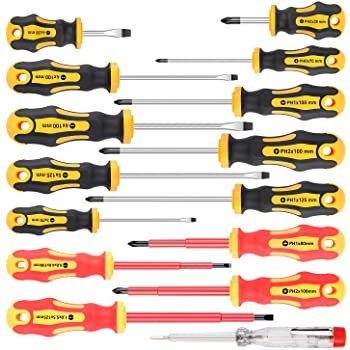
Having
a complete set is must. While
flat-head and Philips-head screwdrivers are used the most, you
may want to be ready for when you encounter Allen
(hexagon-shaped), Torx (star-shaped) and other less common types
of screws. Not only you need at least 4 types of screwdrivers,
you also need several sizes for each one of them. From
experience, we learned that you can get by just fine with 5
screwdrivers (2 sizes of flat and Philips screwdrivers and one
precision
screwdriver handle with a set of bits). |
|
|
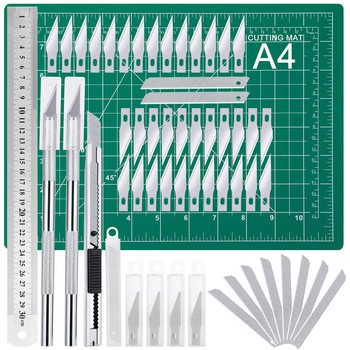
Cutter (hobby/utility knives) When working on enclosures, supports, bindings and other structural parts of electronic projects, you may need to cut plastic, vinyl, cardboard, and other soft materials. For these tasks, we use a box cutter and a precision hobby knife. To achieve greater precision and protect your work area, get a kit with steel ruler and cutting mat, they are useful for other tasks too. When cutting hard materials, keep your fingers out of the way and wear safety glasses as the razor-sharp blade can slip or snap unexpectedly and your reflexes might not be fast enough. |
|
|
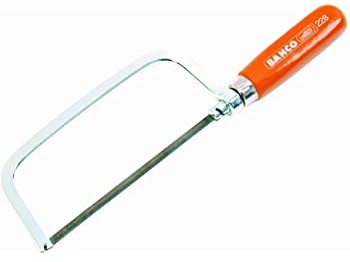
Now and then you might need to cut thick plastic, acrylic, aluminum, tin and other hard materials. In most cases a small metal saw is all you need. If you plan on cutting a lot of metal and wood too, also consider this one. Having a good quality saw will save you some frustration, even if you rarely use it. |
|
|
In the context of electronics, files are mainly used for finishing enclosures, to smooth the edges of cuts and drilled holes, or to help some parts fit better. Files
come in various shapes, flat for edges, round for holes, square
and triangular for corners and flat-rounded for curves. Files
with diamond coating can be used on hard materials such as glass
and steel. Flat thumb areas on the handle help to feel and
maintain the correct file angle. |
|
|
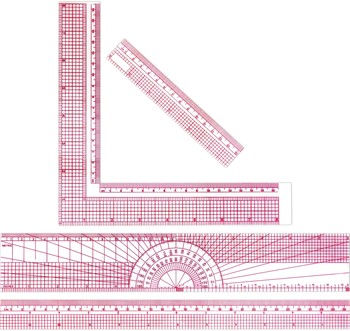
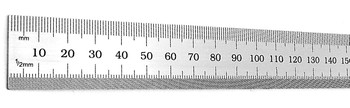
You may want to keep a transparent ruler handy to measure lengths of wires, dimensions of enclosures, mounting holes spacing, depth, thickness and more. Preferably get a long ruler with both imperial and metric measurements, which measures from the edge, making it easier to measure depth. It may be helpful to also get a thick steel ruler or carpenter square, to use as a straight edge/guide for use with a box cutters and hobby knives. |
|
|
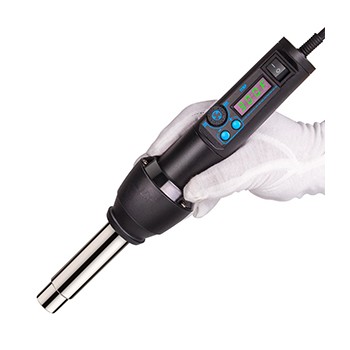
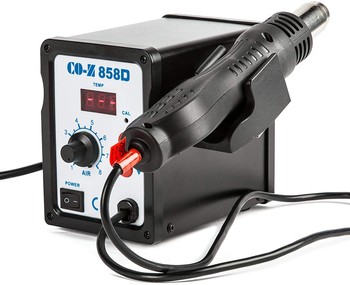
Heat
guns are used for soldering and removing surface-mount devices
(SMD) which tend to be very small. A soft solder paste is applied
with a syringe on the PCB pads, then the part is placed with
tweezers on top of the paste and heat is applied carefully until
the paste melts and becomes shiny, becoming solid once it cools
down. The heat gun can also be used to secure heat-shrink tubing and to bend acrylic. If you don't need portability you can get a cheaper table model with lighter handle. |
|
|
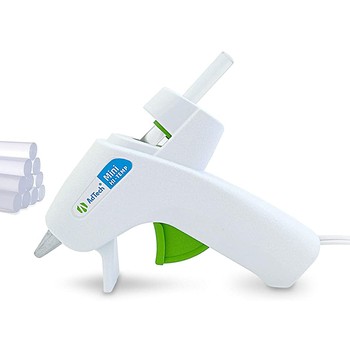
It
uses glue sticks made of some plastic compound which melts at
100�C or more. A trigger slowly pushes the glue stick through
a heated nozzle, causing the glue to melt and come out of the
nozzle. Once it cools down it becomes solid again. |
|
|
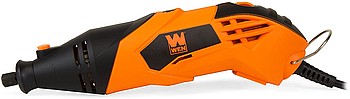
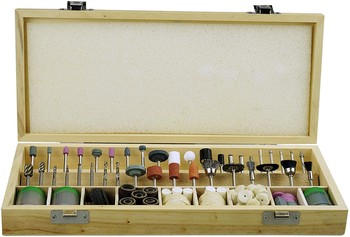
It is an essential tool for those making their own PCB or working on enclosures and moving parts. For engraving and other precision work you can hang the motor and use the extension cable to minimize the weight in your hand. Also get a complete set of attachments which should cover all your needs for working on metal, plastic, wood, and other materials. |
|
|
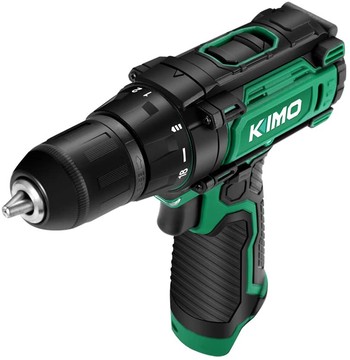
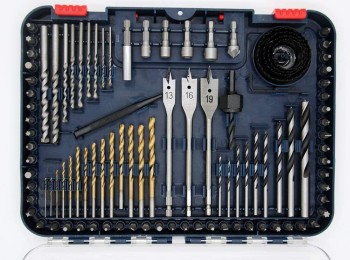
Enclosures do require many machining tools, including a drill, especially to make holes for LEDs, switches, potentiometers, and wires. Quality drills tend to be expensive. The cheapest one is less than $30, it works but has limited performance and warranty. A better choice would be a solid mid-range model from a known company, with a good warranty, or get a professional one for under $200, a reasonable investment if you use it daily. Cordless drills double as electric screwdrivers. In addition to the drill, you should get a set of drill bits that covers most of your needs. Round LEDs require either 3mm or 5mm holes, toggle switch and potentiometer threads require holes from 6mm to 12mm. Most kits only include bits up to 9.5mm (3/8�) and larger metal bits cost almost as much as the whole kit, so getting a step drill bit might be a good alternative. |
|
|
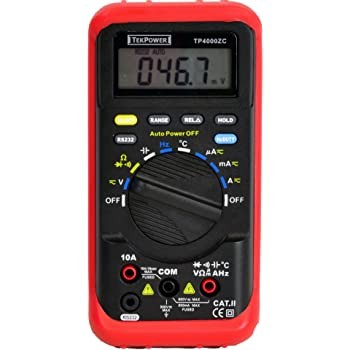
Possibly
the most used tool in the list, the multimeter allows you to
measure voltage, amperage, resistance, capacitance, frequencies
and even temperature. |
|
|
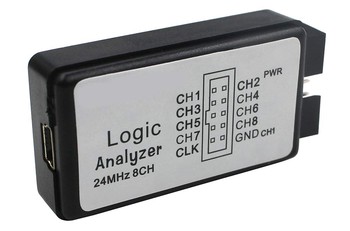
This
is a specialized tool mainly used to troubleshoot digital
components, so you probably won't need this tool until you get
into advanced circuit design, but for fun and educational
purposes you could get a cheap one with 8 channels which connects
to the USB port of a computer, and watch graphs showing the
input/output pins of an Arduino or the sound waves coming out of
your speakers. |
|
|
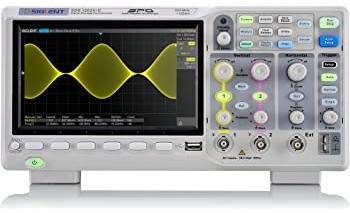
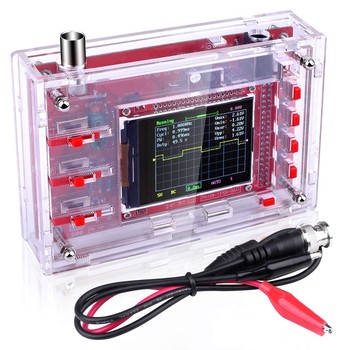
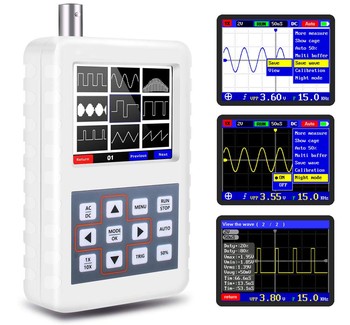
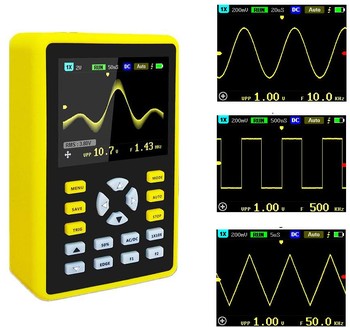
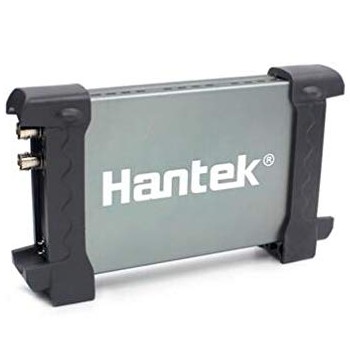
Oscilloscopes are like a voltmeter, frequency analyzer and logic analyzer in one, they make it possible to record and visualize changes in voltage that would be too quick to observe on a regular voltmeter, by recording the voltage in a memory buffer which can store several seconds of voltage fluctuations. The measured voltages are displayed as a graph on its screen and the user can zoom in on any part of the graph, down to microseconds or even nanoseconds, for further analysis. They can also automatically calculate the frequency of waveforms, decode various communication protocols, and so much more that it would take an hour to go over all the features they offer. You
can spend thousands of dollars on a professional name-brand
oscilloscope, or hundreds of dollars on a still
professional-grade cheaper
brand, or get a very cheap beginner
model, or a battery-powered
model which fits in your pocket, or the Hantek
USB model which can turn you PC into a fully featured
oscilloscope. |
|
|
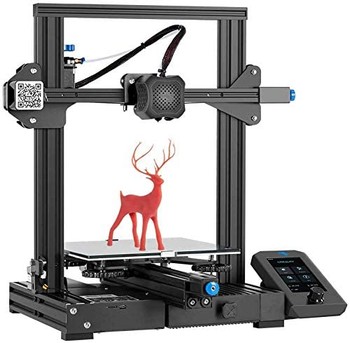
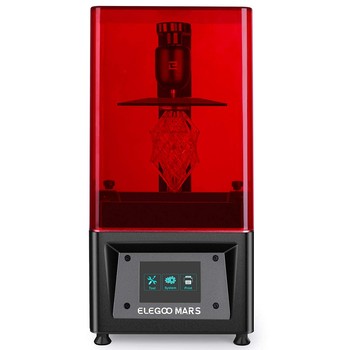
If you want to create custom enclosures with complex shapes, custom brackets, blinking bling, or art pieces, sooner or later you'll wish you had a 3D printer. Having objects which once only lived in our imagination appear on the printer plate is a truly gratifying experience. For your first 3D printer you shouldn't spend a small fortune, for less than $300 you can get a very good one that will cover all your needs. The most common printer type works by extruding paper-thin layers of melted plastic on top of each other (additive printing), and uses spools of plant-based bio-degradable plastic filament (PLA) or synthetic compounds such as PETG and ABS for greater strength or flexibility. Filaments are available in every color, and even mixed with carbon fiber or wood. This video illustrates the filament-based printing process. Resin 3D printers are quite common too. They use a tank filled with liquid resin and create hair-thin layers by displaying a single layer on a screen lit by ultraviolet light, located at the bottom of the tank. The UV light causes the resin to become solid and an adhesion plate moves up one layer at a time. The object is printed upside down as it comes out of the resin. This video illustrates the resin-based printing process. So, which printer is best? Overall filament printers have more advantages. They are cheap to scale up to handle large prints, some large printers cost less than $400 if you are willing to assemble it yourself. They offer a wide selection of colors and materials, PLA is safe for children toys and food containers, and some models double as laser engraver/cutter. The main limitation of filament printers is their vertical print quality, the surfaces have visible layers like the pages of a book, which requires extra labor to smooth with sandpaper or a heat gun. The
advantage of resin printers is that they can produce smooth and
more detailed prints, but resin prints are more fragile, the
resin is toxic, requiring air filtration and special handling,
although non-toxic alternatives are available for a premium, and
the print area is small on affordable models, roughly the size of
a cell phone, models with larger print areas cost thousands of
dollars. |
|
|
COMPONENTS |
|
|
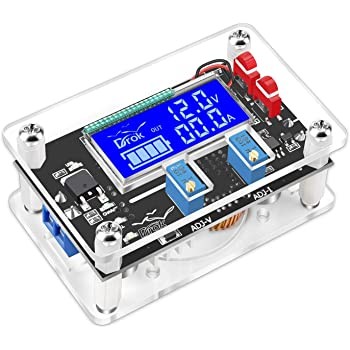
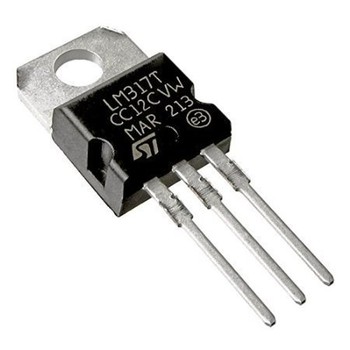
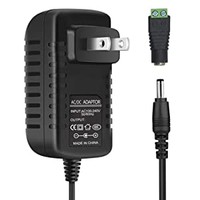
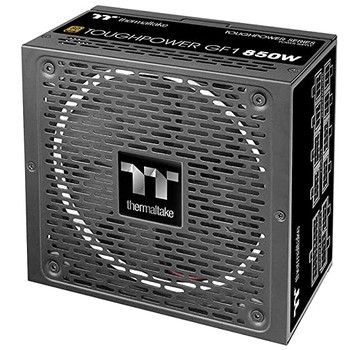
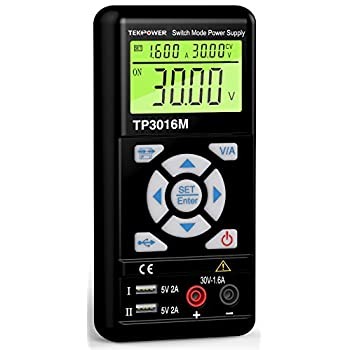
Power Supply or Battery When it comes to powering your projects and devices, many options are available, batteries, wall adapters, PC power supplies, and adjustable power supplies. The most common voltages used for electronics are 3.3V, 5V, 9V, and 12V and can be obtained from almost any power source. Batteries: Conventional batteries only provide voltages in multiples of 1.5V (1.2V for rechargeable batteries), so to get 3.3V and 5V you can use an adjustable DC-DC buck converter or a fixed-voltage regulator. The voltage regulation keeps a steady output voltage while the input voltage from the battery slowly decreases. Using rechargeable batteries is more economical in the long run and much better for the environment as it only requires manufacturing and recycling one rechargeable battery instead of hundreds of disposable batteries. Power supplies: For fixed devices and prototyping, one would normally use a power supply. They come in many flavors, fixed voltage like USB chargers, variable voltage like bench supplies, and multi-voltage like desktop computers power supplies. For random testing and repair jobs we use a portable adjustable power supply which can produce any voltage from 0.3 to 30V and is easy to carry. For prototyping on our workbench we use a modular ATX PC power supply with an ATX breakout board providing 3.3V, 5V, and 12V outputs, and added a buck converter to get 9V from the 12V output. This setup allows us to power a large number of prototypes as PC power supplies are designed to handle heavy loads. |
|
|
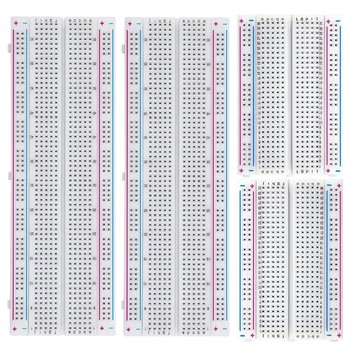
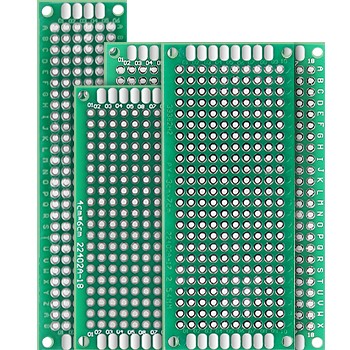
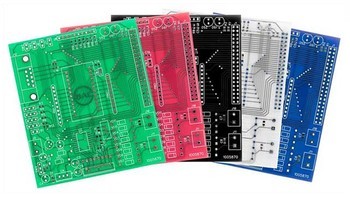
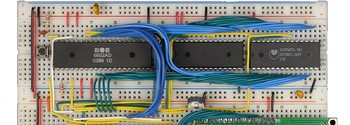
Breadboards, Prototyping PCBs, Production PCBs Breadboards are used to quickly make temporary prototypes, and once you are happy with the design you can remove the components and reuse them for other projects. They have power rails on each side and rows in the middle with 5 holes interconnected by a rail on each side. Avoid low quality breadboards which can often be recognized by the presence of uppercase letters and numbers not matching symmetrically on both edges. The holes use standard 0.1� spacing so there is no need to bend the pins of standard components. Prototyping PCBs are often used to make permanent working prototypes by replicating the layout from the breadboard and soldering the components. You can also use these for a device you plan on using yourself or sell as a one off custom-tailored solution for a client. For commercial production you would design and order factory-made PCBs which will be smaller and neater than the prototyping PCB and allows you to have your logo or name and product model silk-screened onto the board, giving it a more professional appearance. Most PCB manufacturers will accommodate small production runs of 1 to 5 units for only a few cents more per unit than large orders. With small runs of 10 to 20 units you can order unpopulated boards and solder the parts yourself, or sell DIY kits at a discount, but for larger production runs you may want to use surface-mount components and have the PCB manufacturer automatically assemble them for you as it will still cost you less than if you were to buy the parts yourself, not to mention the time it takes to place and solder the parts, and potential for human errors.
|
|
|
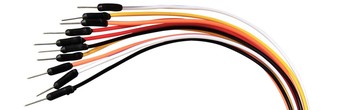
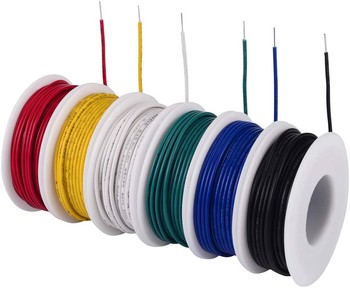
Wires The most rudimentary yet essential part of a circuit is its wiring as it carries the electricity everywhere. On breadboards we typically use solid jumper wires laying flat on the board, but on some occasions we also use flexible jumper wires arching over other wires or connected to an Arduino. To connect sensors, LCD screens and other devices with several pins in a row, we prefer to use �IDC� flat ribbon jumper cables, keeping all the wires looking neat and tidy. Pre-made
jumper wires are most convenient for prototyping, but for the
final product you can make your own wires from spools to have
just the right length. It is best to get boxed colored spools of
flexible
and solid
wires for easy dispensing, and a flat
ribbon cable roll. |
|
|
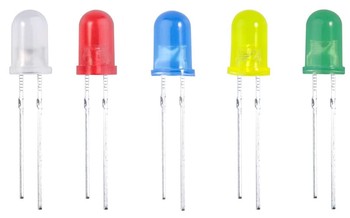
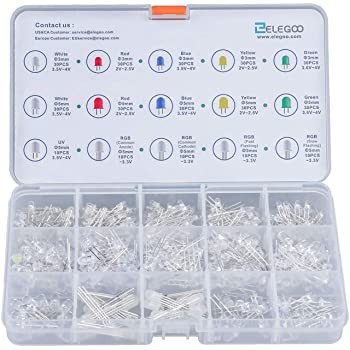
LEDs (Light Emitting Diodes) They come in different shapes and colors, and are essentially a clear plastic container encasing a gas which glows when electricity coming from the positive pin or electrode (anode) passes through it as it goes to the negative electrode, (cathode). The shape of the anode and cathode creates a polarity which prevents the current from flowing in the opposite direction. Red, yellow, green, blue, and white LEDs are used for indicators and illumination, while infrared and ultraviolet LEDs are used for specific applications such as TV remotes, security cameras, and water purifiers. Some LEDs combine red, green and blue (RGB) in one, allowing you to recreate any color, they have 4 pins instead of 2. |
|
|
Using the same anode/cathode approach as LEDs, diodes only allow electricity to flow in one direction. They are used to force the flow of electricity down the right path when circuits are converging, protecting sensitive components from reverse polarity, and can also be used to convert AC into DC. |
|
|
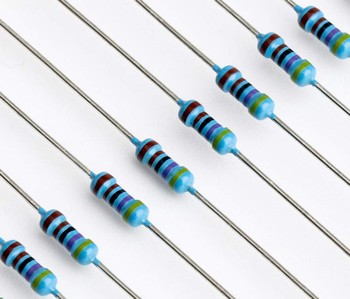
As
their name implies, resistors create resistance, effectively
restricting the flow of current, causing the voltage to decrease
proportionally to the resistance. A typical use for them is to
safely connect 2V or 3V LEDs to 5V circuits. Resistance is
measured in Ohms (Ω). The colored bands around resistors
represent their Ohm value, and you can use software or a simple
formula to calculate the voltage drop from each value. |
|
|
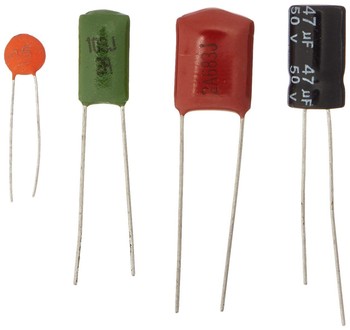
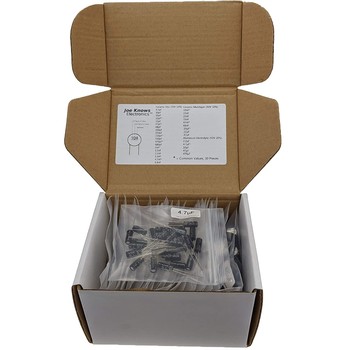
They act like storage buffers for electricity, much like a battery. They can't hold a charge for very long but can be discharged very quickly if you need a lot of power at once. The buffering aspect makes them ideal for power regulation as the input voltage and current can fluctuate while the output of the capacitor remains steady. The storage capacity (capacitance) is measured in Farads, and most electronic devices use small capacitors in the picofarad (pF) or microfarad (�F) range, while power supplies and audio amplifiers use large capacitors ranging from 10 millifarad (mF) to several Farads. The most commonly used capacitors are electrolytic (cylindrical) and ceramic (lentil/bean-shaped). To
save you the trouble of buying thousands of capacitors to put
together a kit with the 3 types and 30+ values you may need, we
recommend the
most varied kit out there from E-Projects (when in stock), or
the comparable
hand-picked selection from Joe Knows Electronics. |
|
|
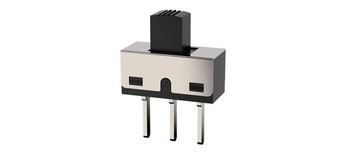
Temporary switches allow electricity to pass through them while they are held down, like the keys of a keyboard or phone buttons, and are referred to as �normally open� (NO) while �normally closed� (NC) models do the opposite and interrupt the flow of electricity while they are held down. Toggle switches can stay on or off, like the light switch on a wall. They come in many shapes such as levers, push buttons, slide switches, and DIP switches which are arranged in a row of miniature slide switches. Rotary switches have multiple �on� positions, like the round switch on a fan, and are sometimes referred to as �selector� switches. Encoder switches are a special kind of rotary switch, they can be rotated any number of turns, give a soft clicking feeling every few degrees and can also be pressed down. They are used on car radios, mouse scroll wheels, to scroll and select menu items, and to precisely move stepper or servo motors. To get the best value, consider getting the Jameco switch grab bag, it contains around 150 randomly selected switches of all types, that's only $0.17/switch. |
|
|
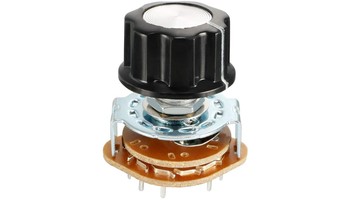
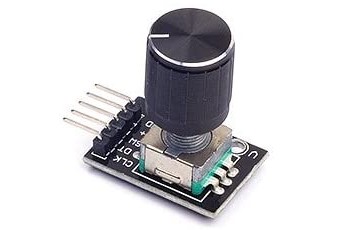
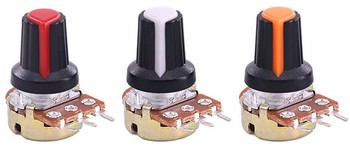
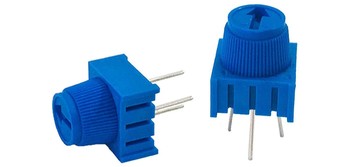
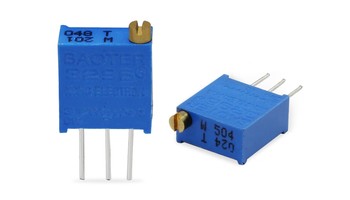
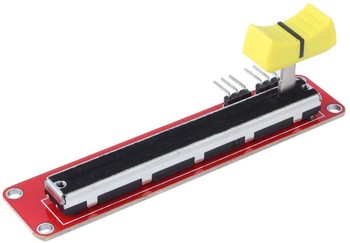
Commonly
used for the volume button of radios, potentiometers are variable
resistors. Their control knob is connected to a metal finger
which slides on a resistive strip and the further away the finger
is from the beginning of the strip, the more resistance is
created by the increased distance electricity has to travel from
the beginning of the strip to the finger. The
three main types are: |
|
|
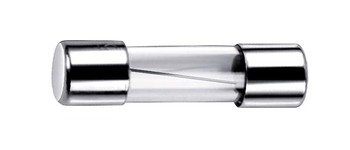
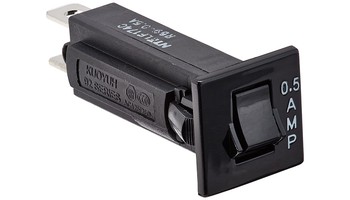
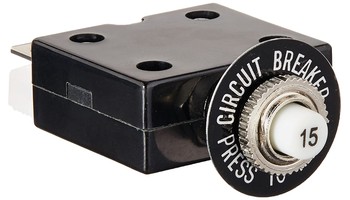
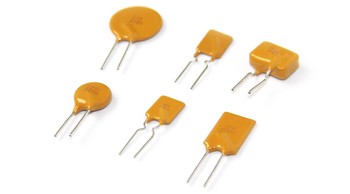
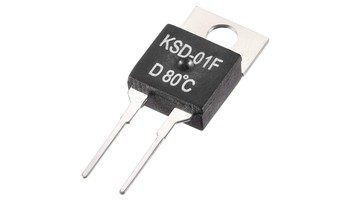
Fuses Fuses protect devices and sometimes the user from short circuits and overloads (excessive current consumption). Glass fuses and automotive fuses use a filament which breaks when more current flows through it than their maximum amperage rating, for example 5 amperes (5A), and must then be replaced. Thermal circuit breakers can be reset, they have a little switch or button which pops out when their amperage rating is exceeded, and can be reset by pushing the button back in. They are commonly found on power extension strips and bathroom outlets. Self-resetting fuses temporarily interrupt the flow of electricity when their amperage rating is exceeded, which causes them to warm up and create significant resistance. Once the power has been turned off or the excess load removed, they cool down and allow electricity to flow again. We use them a lot during prototyping as mistakes do happen. They can easily be mistaken for ceramic capacitors so make sure to label the bag or box where you store them. Thermal
cutoff fuses
protect equipment by cutting the power off when the surrounding
temperature exceeds their rated value, (or their maximum amperage
rating is exceeded) which causes their internal conductor to
melt. They are cheap but have to be replaced to resume operation.
The alternative is to use more expensive thermal
switches
(thermostats) as they serve the same purpose but automatically
restore the power once the temperature returns to normal. |
|
|
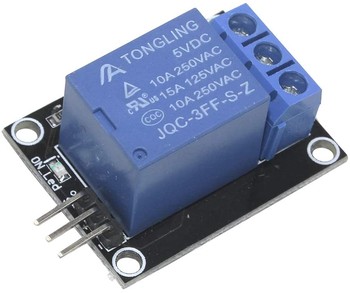
The purpose of these electrically-controlled switches is to be able to use a low current to activate a high current switch. An electromagnet uses the low current to pull a switch connected to the high current. This means you can use a small switch and long thin wires to turn on a big power supply or motor, keeping thick wires shorter and potentially dangerous high current confined to a small area on the circuit board. It also makes it possible to control such devices from low voltage micro-controllers. |
|
|
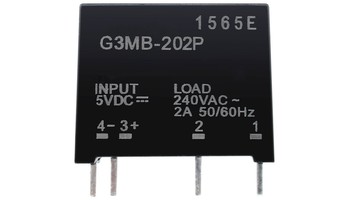
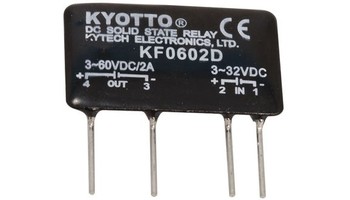
This type of relays has no moving parts, instead it uses transistors or similar semiconductor devices to switch the connection on or off. In most cases a tiny LED on the low current side simply shines light at a photo-sensitive cell on the high current side which activates the transistor while keeping the control side electrically isolated from the load side. Unlike mechanical relays, different models of solid-state relays must be used for AC and DC applications, they last a very long time and can be switched on much faster. |
|
|
Transistors act like relays, they use semi-conductors to control the flow of electricity, and have the ability to be turned on and off so quickly that they are often used as amplifiers (which was the original motivation for their invention) but are equally useful as mini relays and for binary applications. Transistors
come in many types, the most common ones are called NPN (negative
positive negative) and PNP The
NPN variant is controlled by applying a positive voltage to the
control pin, while the PNP variant is controlled by grounding the
control pin. The NPN type seems to be used more often, but it
really depends on your design, so make sure you have both kinds
available. |
|
|
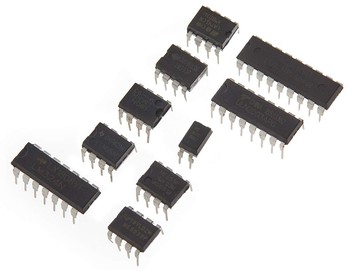
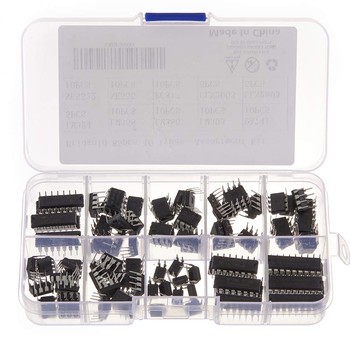
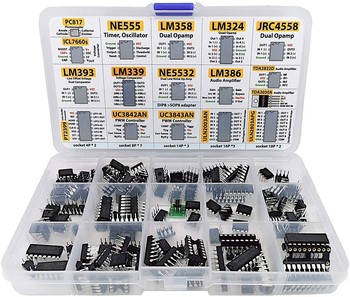
ICs (Integrated Circuits) These cute and mysterious bug-looking devices simply are circuit boards shrunk into a very small package. They typically contain tiny resistors, capacitors, diodes and transistors connected to input/output pin. They cover such a broad array of purposes that we can't possibly list them all but the simplest ones may replicate electrical pulses, keep a count, or generate a pulse, while complex ones might include many functions like the brain of an alarm clock which keeps track of the time, alarms, controls the LED display and responds to button presses. Some often-used ICs in basic electronics are the 555 timer chip which can be used to blink LEDs, and level shifters which can be used to exchange signals between incompatible 3.3V and 5V devices. It's impossible to find a kit with all the existing ICs, that would be thousands of them, but we found two kits which offer a good selection of general purpose ICs. One kit has 10 common types of ICs, the other has 15 types of ICs and DIP sockets which you would solder to circuit boards, and then plug the IC into the socket, that way you don't risk damaging the IC by soldering it directly to the PCB and can replace the IC easily if it breaks.
|
|
|
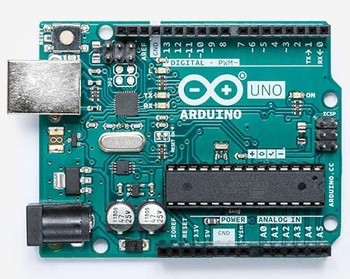
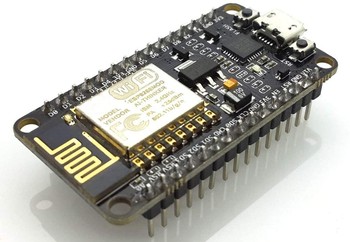
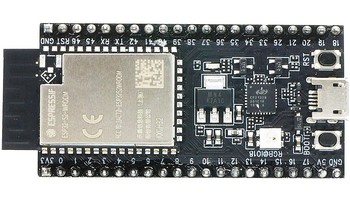
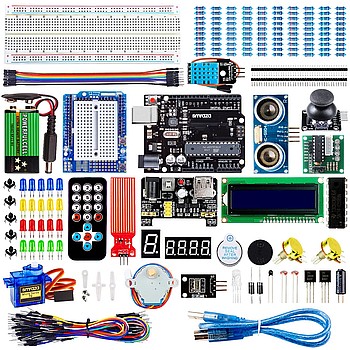
Technically similar to ICs, microcontrollers generally have many functions and many pins. They can be programmed with conditional logic to react to input pins and control output pins. They power the Arduino, ESP-8266, ESP-32, and most simple devices with LCD screens. The easiest way to get started is to get an Arduino starter kit with many accessories, and grow your kit over time. Unlike microprocessors, microcontrollers have everything integrated inside a single chip, processor, memory, storage, I/O switching, etc, and use very little power so they can run on small batteries and don't require cooling. Microprocessors power computers, phones, digital cameras, printers, the Raspberry Pi and many advanced devices. They are designed to provide as much processing power as possible, which is achieved by combining millions or billions of transistors in a small package and use the highest frequency possible which produces heat and requires more electricity. They also rely on external chips for memory, storage, I/O, etc which requires additional power. Microprocessors
are rarely used in hobby projects due to the complexity involved
in interfacing the chips with other components, but when you do
need more computing power than microcontrollers can provide, the
solution is to use a small single-board computers such as the
Raspberry
Pi Zero,
Onion
Omega2+
or PocketBeagle,
all of which provide plenty of pins to interface with your
components. |
|
|
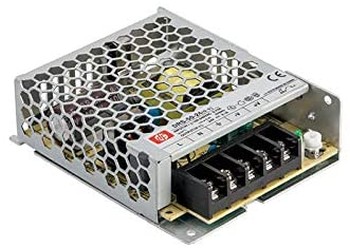
Power supplies use an isolated transformer to convert the 120 Volts from the wall outlet to a lower voltage. Isolated transformers have two coils of copper wire which are not directly connected to each other but are wrapped around a shared steel or iron rod. The primary coil is connected to the wall outlet and produces a magnetic field which is amplified by the iron and enters the secondary coil by induction, where it turns back into electricity. The resistance from the number of turns in the coils and induction losses lower the voltage from 120V to a predefined voltage, e.g. 12V. When designing large devices, it is sometimes preferable to locate the power supply inside of the enclosure. In most cases mass-produced power supplies cost less than the sum of their parts, if bought separately, so we either use barebone units or remove and use the circuit board from an external adapter. |
|
|
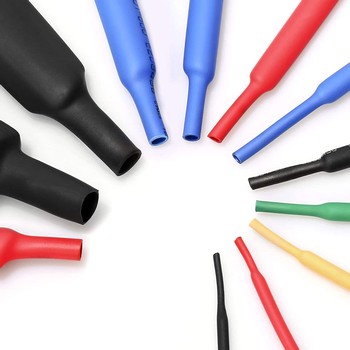
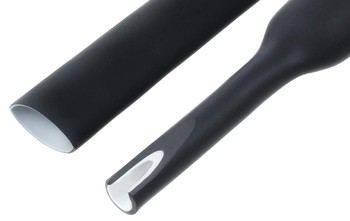
Heat Shrink Tubing Made of non-conductive polymers, they are soft tubes used to reinforce cables on the connector end, or to isolate exposed conductive portions of a wire. In some cases they can also be used to waterproof connections along an extension cable, provided the connector is not much thicker than the the cable. As their name implies, they shrink when exposed to heat (at least twice the body temperature so that they won't shrink while handling them). They shrink by a ratio of 2:1, 3:1, or 4:1, tightly squeezing the wire and/or connector underneath. The proper method to safely shrink the tube is to use a heat gun set to around 100�C, but with some patience it is also possible to safely shrink the tube by holding a soldering iron or 60W light bulb near the tube without touching it, or as a last resort, using a gas lighter and a quick back-and-forth motion.
|
|
|
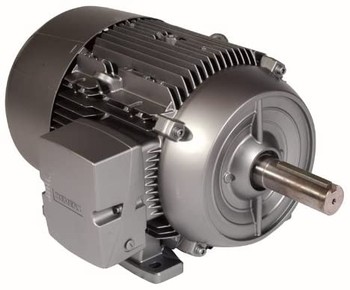
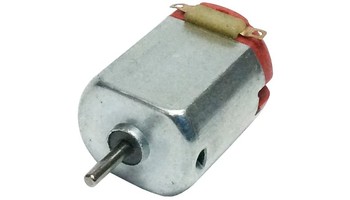
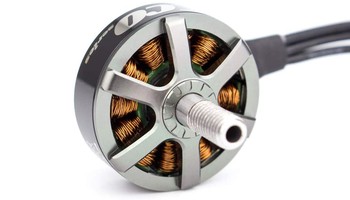
From fans to robots, motors convert electricity into mechanical motion. Many different designs exist but they all use the same basic principle, magnetized coils attracts and repel magnets, causing the motor shaft to spin. AC
motors such as the ones used in a home fan take advantage of the
alternating flow of electricity to pull the motor coil
sequentially towards the next magnet while repelling it away from
the previous one. This greatly simplifies the design but they are
limited to a single speed as the AC phase frequency of 60 or 50
Hertz is constant, requiring additional coil arrangements to
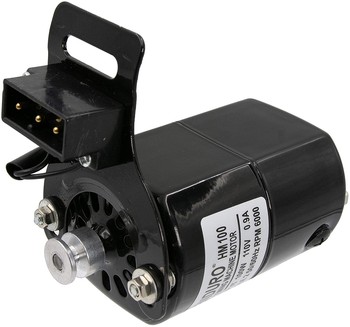
provide additional speed settings. Sawing
machine motors are cheap and fast, they come with a speed
adjustment pedal and can be used for various projects.
DC
motors can either be �brushed
motors� which create alternating magnetic pulses
mechanically using brushes and a commutator ring, like the ones
in a cordless drill, or �brushless
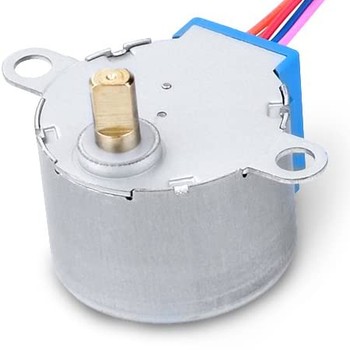
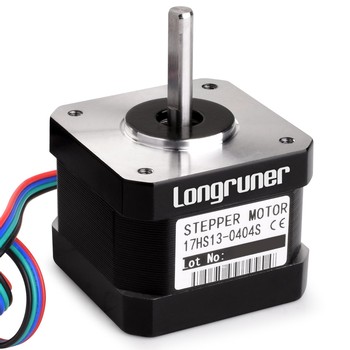
motors� controlled by a sensor and transistors. Stepper
motors can move in small steps by using two or more pairs of
fixed coils and magnets on the shaft with an alternating
north/south magnetic field to precisely rotate the motor shaft.
They are used in printers, security cameras, robots, and many
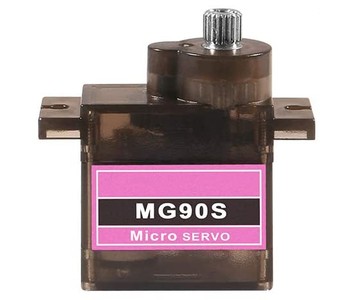
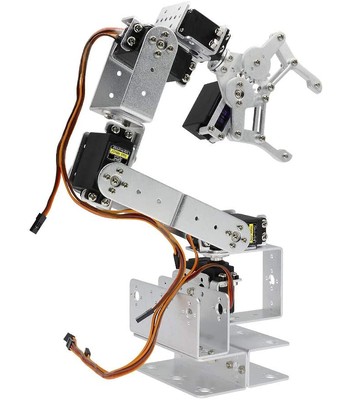
other devices which require precise motion. Servo motors are designed to be rotated to specific angles within 180 degrees, or rotated continuously at very precise speed. They have a lot of torque for their size due to the use of internal gears, and one or more sensors to allow the microcontroller to precisely adjust their angle or speed. They are used on robotic arms, remote controlled toys, and many other devices. |
|
|
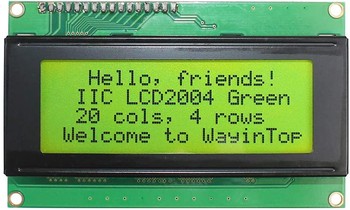
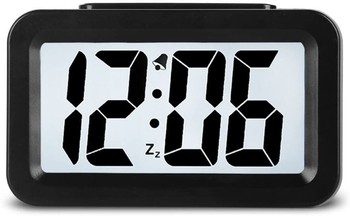
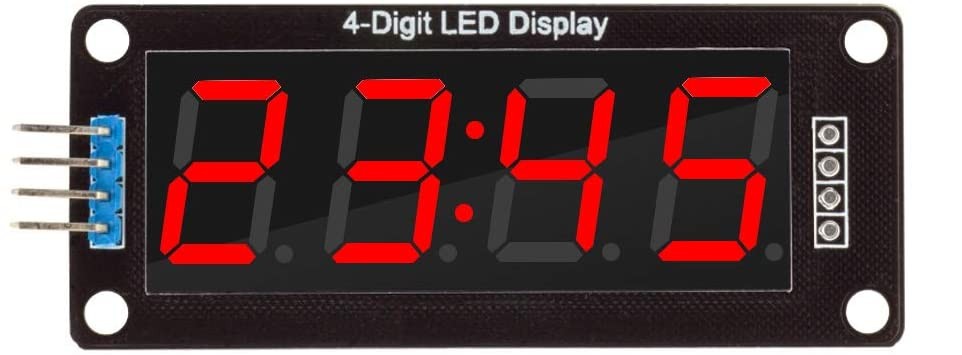
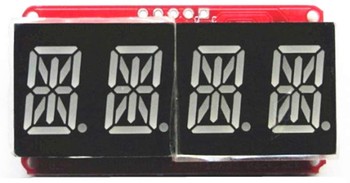
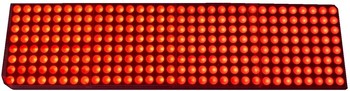
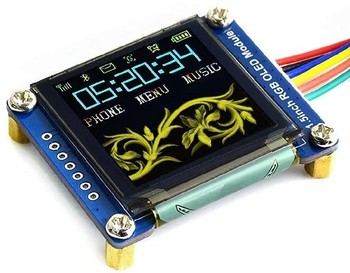
Displays Displays fall into two main categories, LCD and LED, each having its own sub-categories. LCD (liquid crystal display) technology uses a very low current to change the orientation of crystals sandwiched between two layers of clear glass or plastic. As the crystals rotate they block light and become visible. Monochrome LCD displays either have pixels like 20x4 displays, or predefined images, text or shapes like desk clocks. They do not require back-lighting as the black crystals can easily be seen against a reflective background layer. Color LCD screens such as the ones used on phones and TVs have pixels, each made of 3 sub-pixels using red/green/blue filters and black liquid crystal to control how much light is emitted by each sub-pixel, and generally require back-lighting as reflective color displays are still rare. LED (light emitting diode) display technology uses LEDs for each pixel or segment of the display. Red 7-segment displays are commonly used on alarm clocks and are suitable for displaying numbers while 14-segment displays are used when all letters of the alphabet need to be available. Other LED displays use one LED per pixel, either with single-colored LEDs, such as 8x8 matrix displays used in electronics, scrolling displays often used in store windows, or multi-color LEDs typically used for billboards and giant display walls. As RGB LEDs get cheaper, full color 8x8 matrix displays are becoming more affordable. The latest LED display technology is OLED (Organic LEDs). It combines the benefits of LED and LCD technologies, the pixels can be tiny, monochrome or multi-color, use less energy and are easy to view in brightly lit environments. Since they do not require back-lighting it is also possible to produce transparent and flexible OLED displays. |
|
|
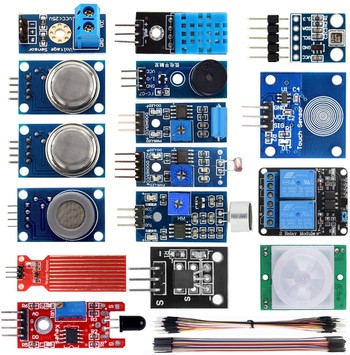
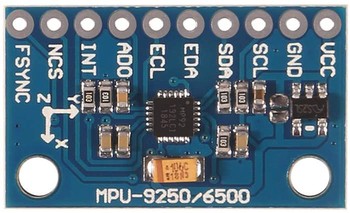
We love sensors! They are one of the most exciting and useful component in electronics. Instead of relying on timers to perform a task at a predefined interval, sensors allow devices to take action, the right action, exactly when it is needed. Simple sensors such as temperature and light sensors can be analog and passive, creating a varying amount of resistance between two pins or wires as the temperature or light varies. The temperature or light intensity can then be derived by measuring the amount of resistance. Digital sensors are more complex, and usually contain a tiny chip which sends out the sensor data to the microcontroller in binary format Ever since the Arduino microcontroller became popular, sensors started to become standardized, using 3 or 4 pin connectors and well established communication protocols such as UART, I2C or SPI, which greatly simplify the wiring, and are provided with software libraries, making it very easy to use in your own programs. Our favorite sensor kit includes everything you need to get started, learn, and build actually useful devices. You can find all kinds of sensors, some of the most useful ones are visible light, infrared light, temperature, pressure, humidity, orientation, gravity, magnetic field, gyroscopic, touch, motion, sound, ultrasonic, image, voltage, and gas sensors. When building an autonomous robot, the more sensors you give it, the more information it can use to make decisions and behave intelligently. Don't worry though, unless you are a master at AI programming, it probably won't try to take over the world. For that matter, most robots don't walk around, they serve a single task like watering plants when the soil moisture sensor value drops below a given threshold, or extinguish fires when heat or smoke is detected, or wave at visitors and greet them with a silly voice when they enter your lab, just to show off your robotics skills. |
|
|
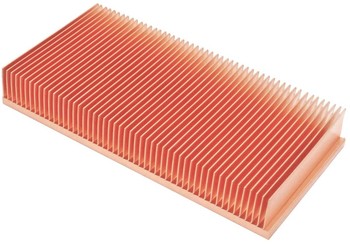
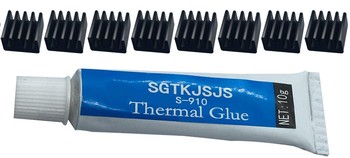
Heat Sinks Some components produce a significant amount of heat, especially transistors, transmitters and microprocessors. In many cases they can be passively cooled by using heat sinks, little radiators made of copper or aluminum which improve heat exchange and dissipation by increasing the surface area in contact with air. For most applications we use aluminum as it is light and cheap, and only resort to copper for applications where maximum cooling efficiency is more critical than weight and cost. Many small aluminum heat sinks come with adhesive backing, and provide enough cooling for low power ICs. In some situations however, it is necessary to use a thermal glue or secure the heat sink with bolts. |
|
|
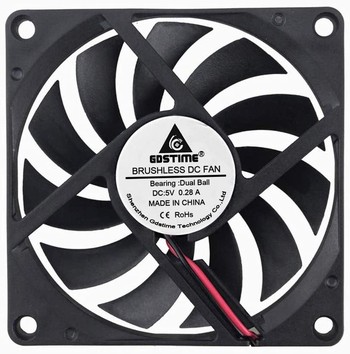
When passive cooling using heat sinks is not enough to keep parts within their safe operating temperature range, it becomes necessary to use fans to bring more fresh air inside an enclosure or force air through a heat sink by mounting the fan directly on top of it. Most fans operate at 12V or 5V, and tend to become noisy at high speed. One way to minimize fan noise is to use a larger fan, it can move as much air while spinning at a lower speed. Another option is to use a fan speed controller, or lower voltage, provided it is high enough to start the fan. Fortunately some case exhaust fans have a thermal sensor which adjust the fan speed automatically, increasing the fan speed and noise only when necessary.
|
|
|
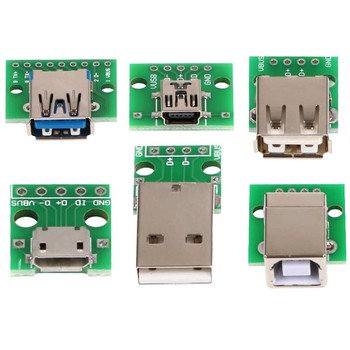
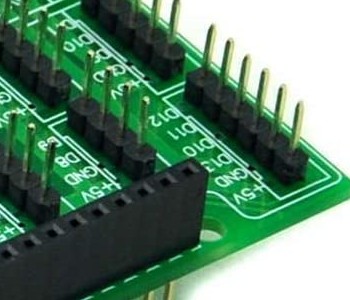
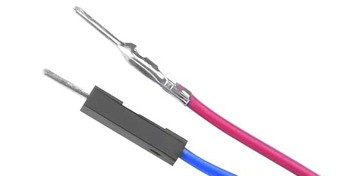
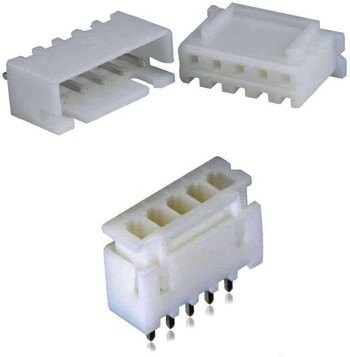
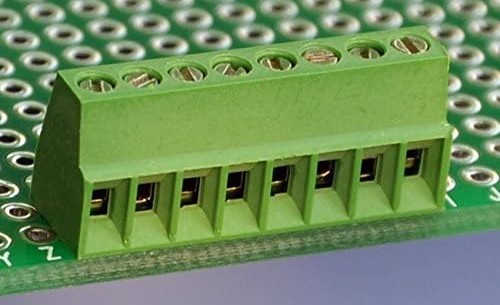
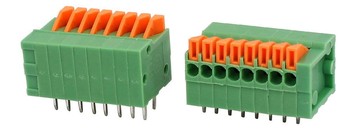
Connectors (Plugs, Headers, Terminals) Many kinds of connectors are used in electronics, the main types we use are plugs, sockets, headers and terminals. Plugs are typically inserted into a socket accessible from the outside of a case, and come in many shapes such as USB plugs, audio jacks, RCA jacks, banana plugs, Ethernet (RJ45) jacks, barrel (power) plugs, serial (DB9) connectors, etc. Their socket or receptacle is typically mounted directly to the PCB but in some instances they are mounted to the enclosure and wired to the PCB. Headers are typically located on the PCB and look like one or more rows of free-standing pins (male headers), or holes in a rectangular black plastic connector (female header). The most commonly used type of header, known as DuPont headers, uses the standardized 2.54mm (0.1�) pitch (pin spacing), which is the default pitch of most components, prototyping boards, Arduino, Raspberry Pi, sensors, and more. Headers (male or female) are soldered to the PCB, while their matching connectors are attached to wires by first crimping each male or female metal pin individually, and then inserting all the pins inside the plastic plug which gets locked to the pins. Another widespread type of header, known as JST comes with various pitches from 1mm to 4mm and is used for rechargeable batteries, computer fans, servo motors, and more. They can generally be distinguished by their white nylon or brown plastic part. They usually have tabs to prevent inserting them the wrong way and to lock them in place. They are impractical for prototyping due to their non-standard pitches. Terminals provide an easy way to temporarily or permanently connect wires to a circuit without soldering. One or more stripped wires are inserted into the terminal and secured by a screw or a spring-loaded tab. |
|
|
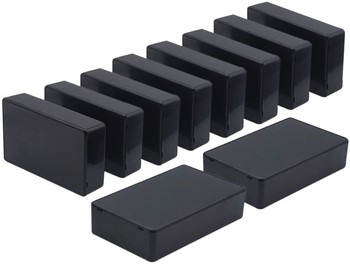
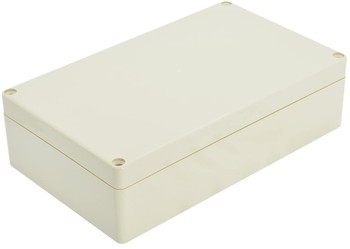
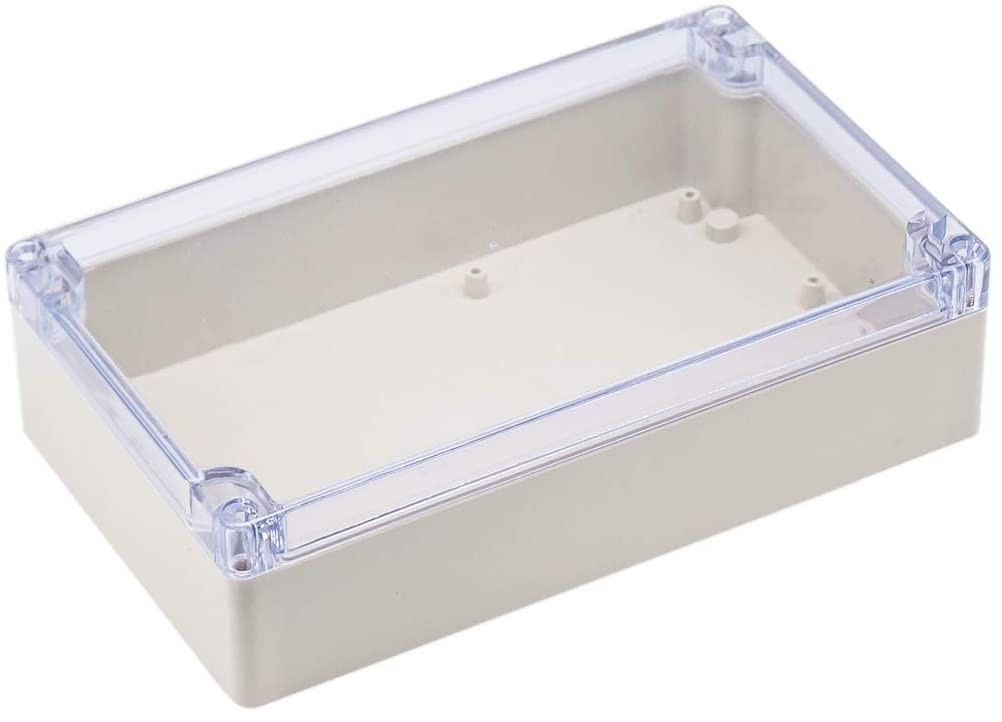
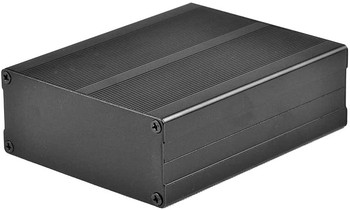
They protect your circuit from dust, fingers and other foreign objects, provide a support to mount switches and LEDs, and generally make your device look better. Depending on the application, you would either pick the enclosure first and make your design fit within the space constraints, or make the device first and then find a fitting enclosure, or make your own out of plastic, wood or metal. Plastic enclosures are cheap, easy to work with, provide electrical insulation and good shock absorption. They are typically made of ABS or PVC which is soft enough to cut, drill, and file without special tools. The ones labeled as junction boxes include a waterproof gasket, making them suitable for outdoors applications. Clear or lightly smoked acrylic enclosures can also be used if you have on-board LEDs or other visual elements that should remain visible. Metal enclosures can be grounded, provide shielding from electromagnetic interference, and facilitate heat dissipation. They do require careful placement of the PCB to prevent short circuits. Brass or nylon spacers can be used to mount the PCB a small distance away from the bottom, and a rigid plastic film can also be affixed to the bottom to prevent sharp soldered pins from causing a short circuit by touching the conductive case. |
|
|
We
hope you found our guide helpful. If you haven't already, check out our Learning and Making Electronics online course. See
our Venice
Inventors YouTube channel
for free video tutorials.
|
|